


It often happens that a ring I create needs to be resized to fit the customer’s finger. I refer to ring resizing as minor jewelry surgery. Each ring goes “under the knife”... and under the flame as well! It’s a routine process in the studio, but it still requires patience and careful craftsmanship.
The process for altering a ring for a larger finger is very similar to making a ring smaller. Today I’ll show you both methods.
HOW A RING IS SIZED UP
First is the method for taking a small ring and sizing it up for a larger finger. To increase the ring size, we need to increase the circumference of the band. We’ll make an incision in the back of the band and insert a few more millimeters of metal stock. The ring is then soldered back together, reshaped, and polished so the new metal looks seamless. Here we are resizing an Aurora Ring with a teal sapphire.

1. Cut an incision in the back of the band

2. Next, we carefully pull the band open to create a space for the new metal

3. A piece of metal stock is placed in the opening. We angle the ends of the band so they line up straight with the new metal stock. Don’t worry! We’ll make the band round again in a later step.
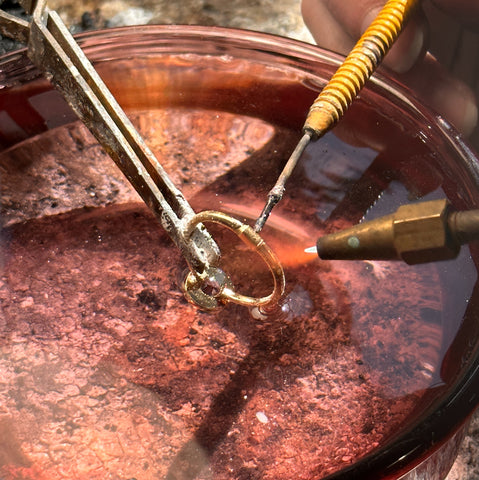
4. We solder both sides of the new metal to the existing band.

5. After soldering we place the ring on a mandrel and hammer it back into a round shape.


6. We use files and sandpaper to shape the new metal stock so it matches the existing band.


7. The ring is polished inside and out.

8. The ring is resized and will now fit a larger finger!
HOW A RING IS SIZED DOWN
Sizing a ring down for a smaller finger happens in a similar way. For this process we’ll cut out a specific length of metal from the band to decrease the ring’s circumference. The ring is then soldered back together, reshaped, and polished to a shine. Here we are resizing an Aurora stacking ring.


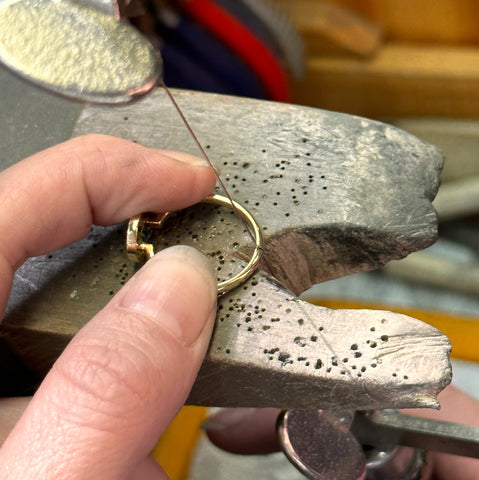
1. We mark the specific amount of metal that we’ll remove from the underside of the band.


2. We saw out the section we have just marked off

4. We close the two ends of the band back together. It’s ok that the ring is not perfectly round at this step. We will fix that!

5. The seam is soldered closed.

6. Using a mandrel and a rawhide mallet, we gently shape the ring back to perfectly round.


7. We sand and polish the band so the connection looks seamless.


8. The ring is polished to a shine.

Done! The ring is resized and ready to fit a smaller finger.
